Connect Data Models to UI Components
In this lesson, we will link data generated by AWS Amplify to the UI Component.
Instruct
- Go to UI Library in Studio. Select
NoteUIthen enter Configure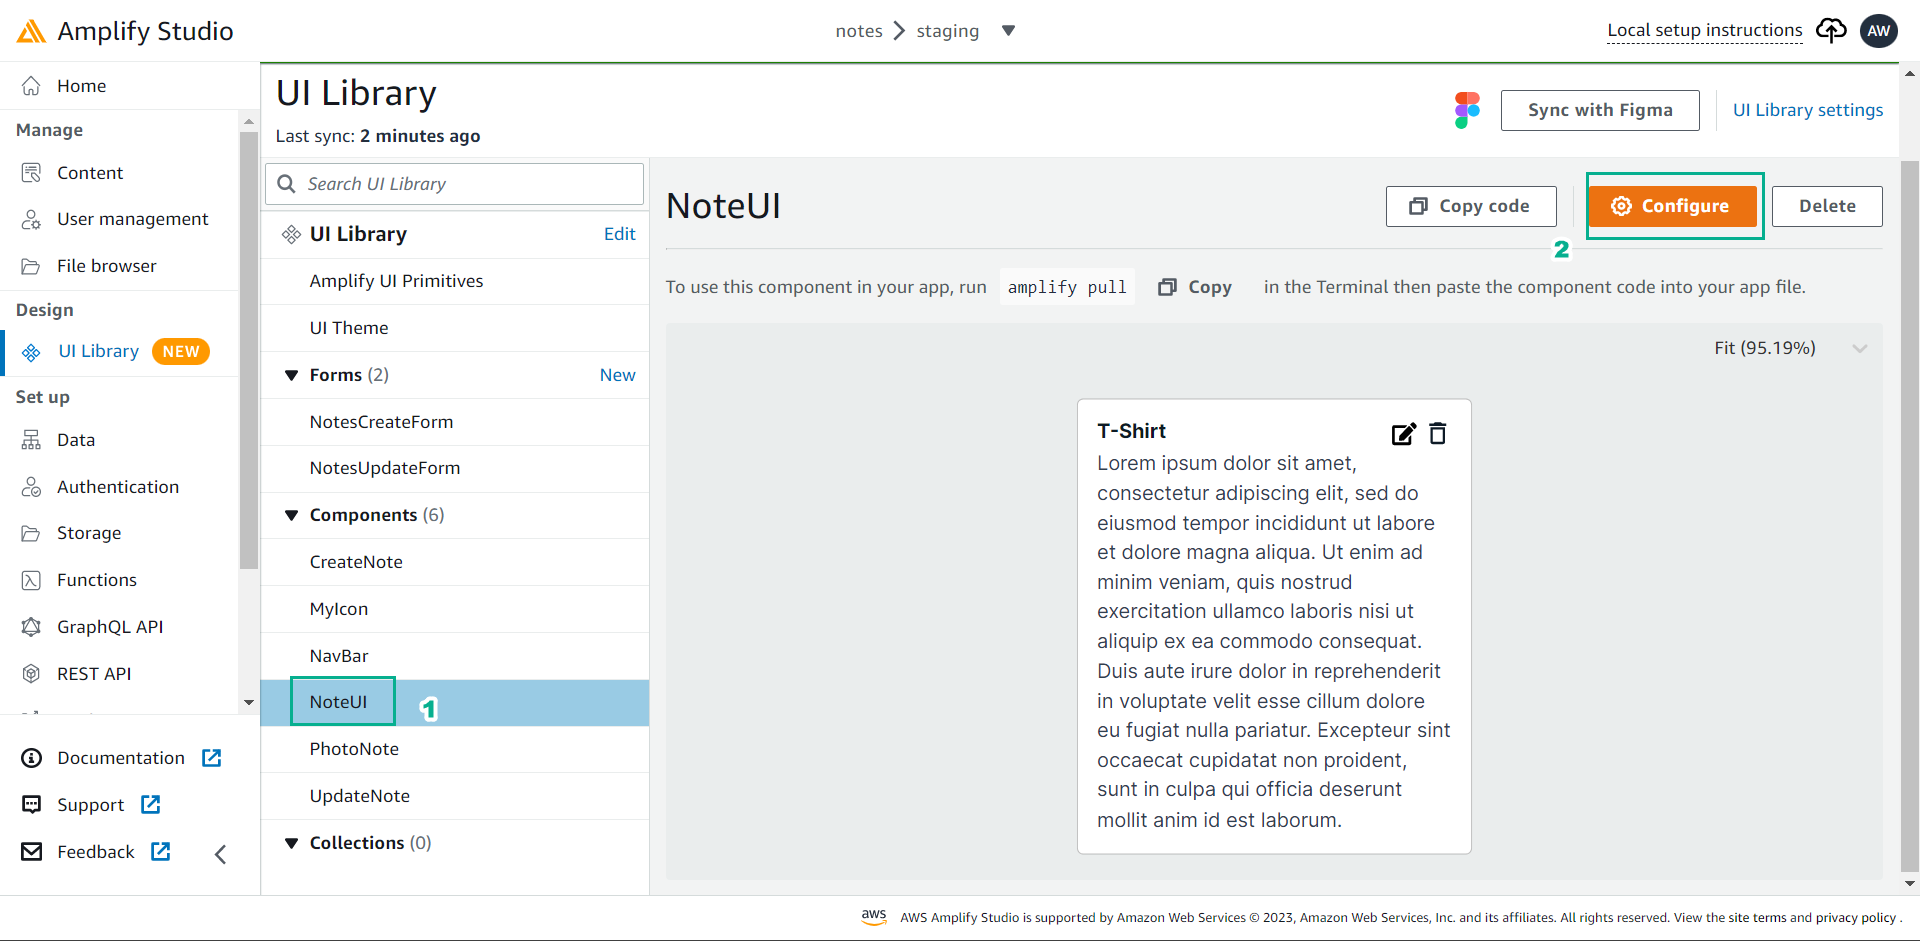
- Click on the title on the existing card that says
T-Shirt.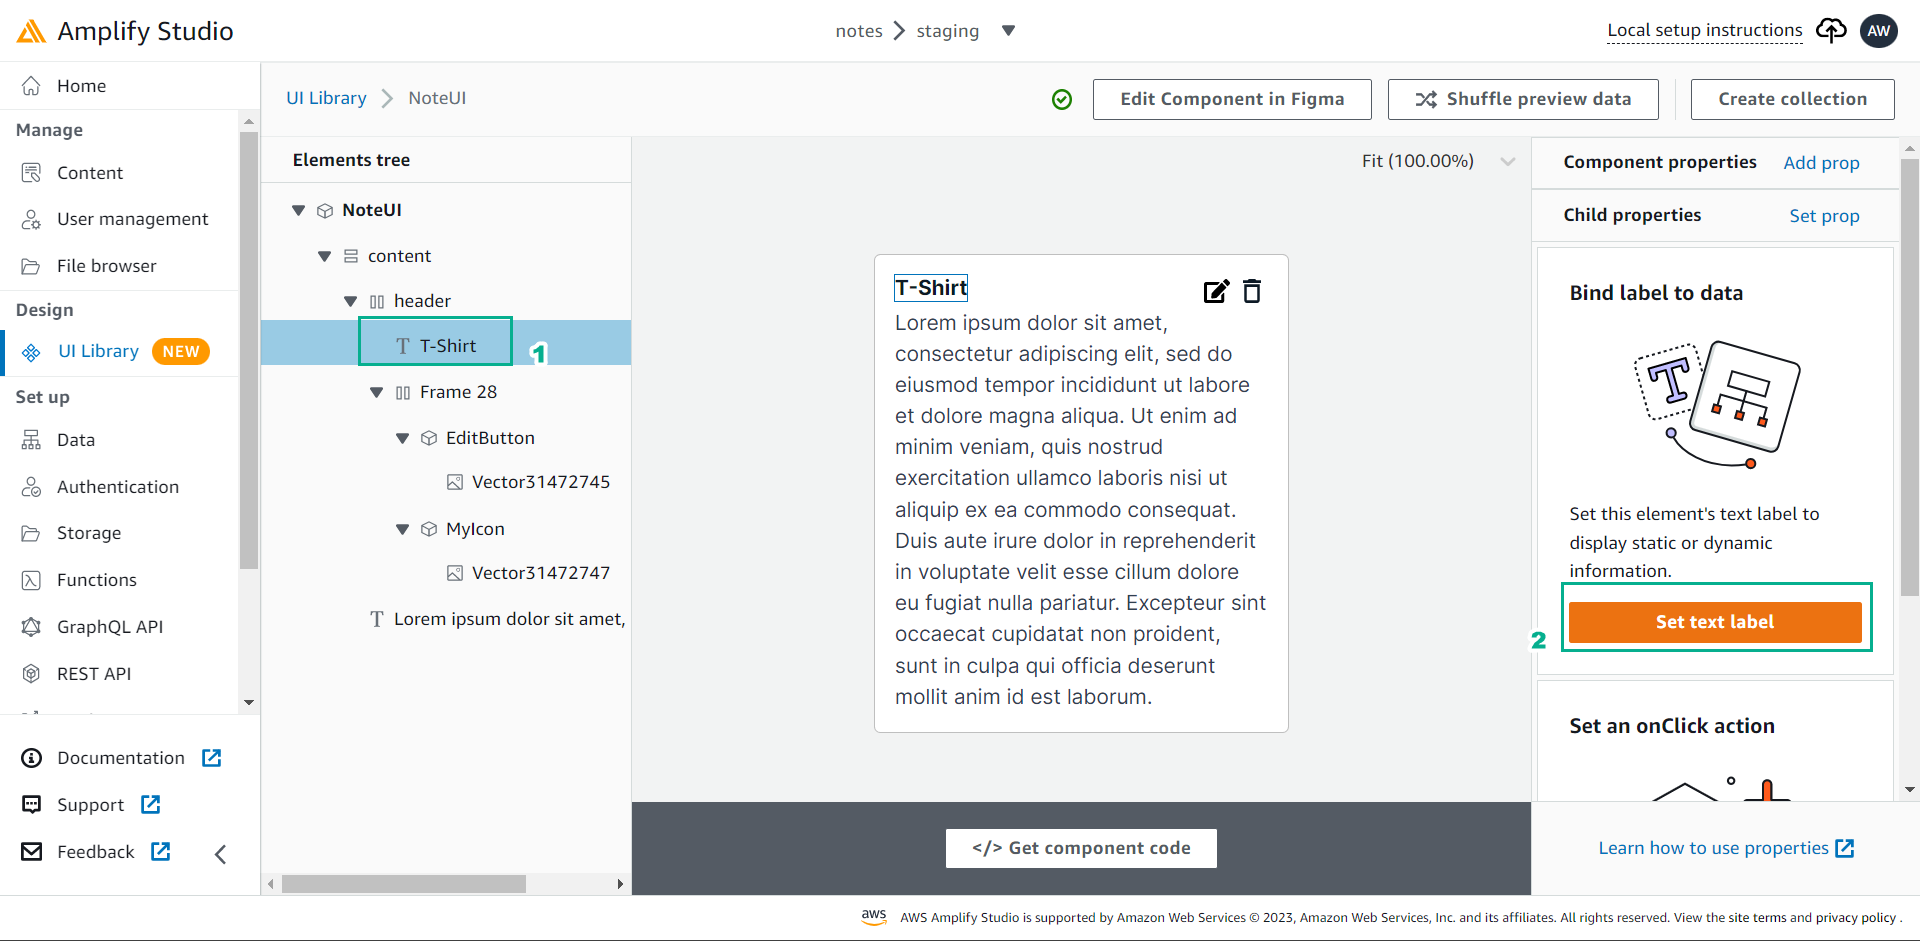 On the right side of the page, Select Set Text Label. We’ll want to make this the title of the note.
- Set the label holder:
note.title.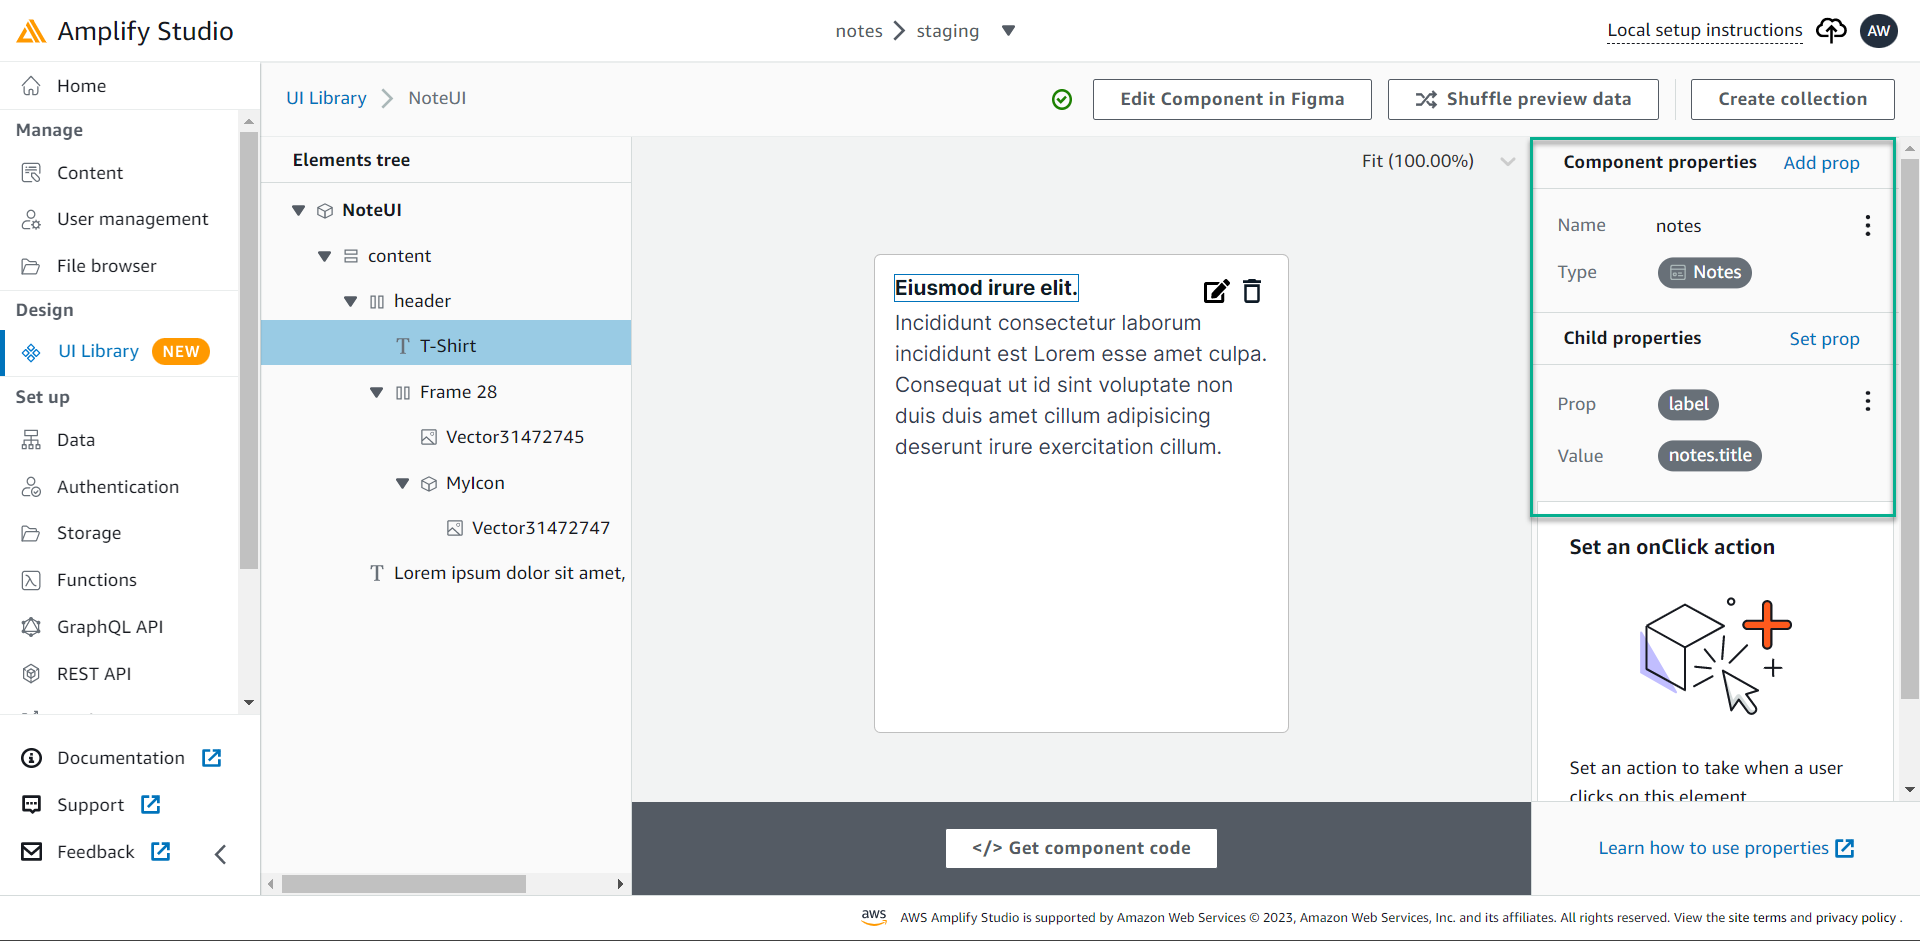 You should see the t-shirt text change to one of the titles of one of the generated notes. If you click Shuffle Preview Data you will cycle through different notes!
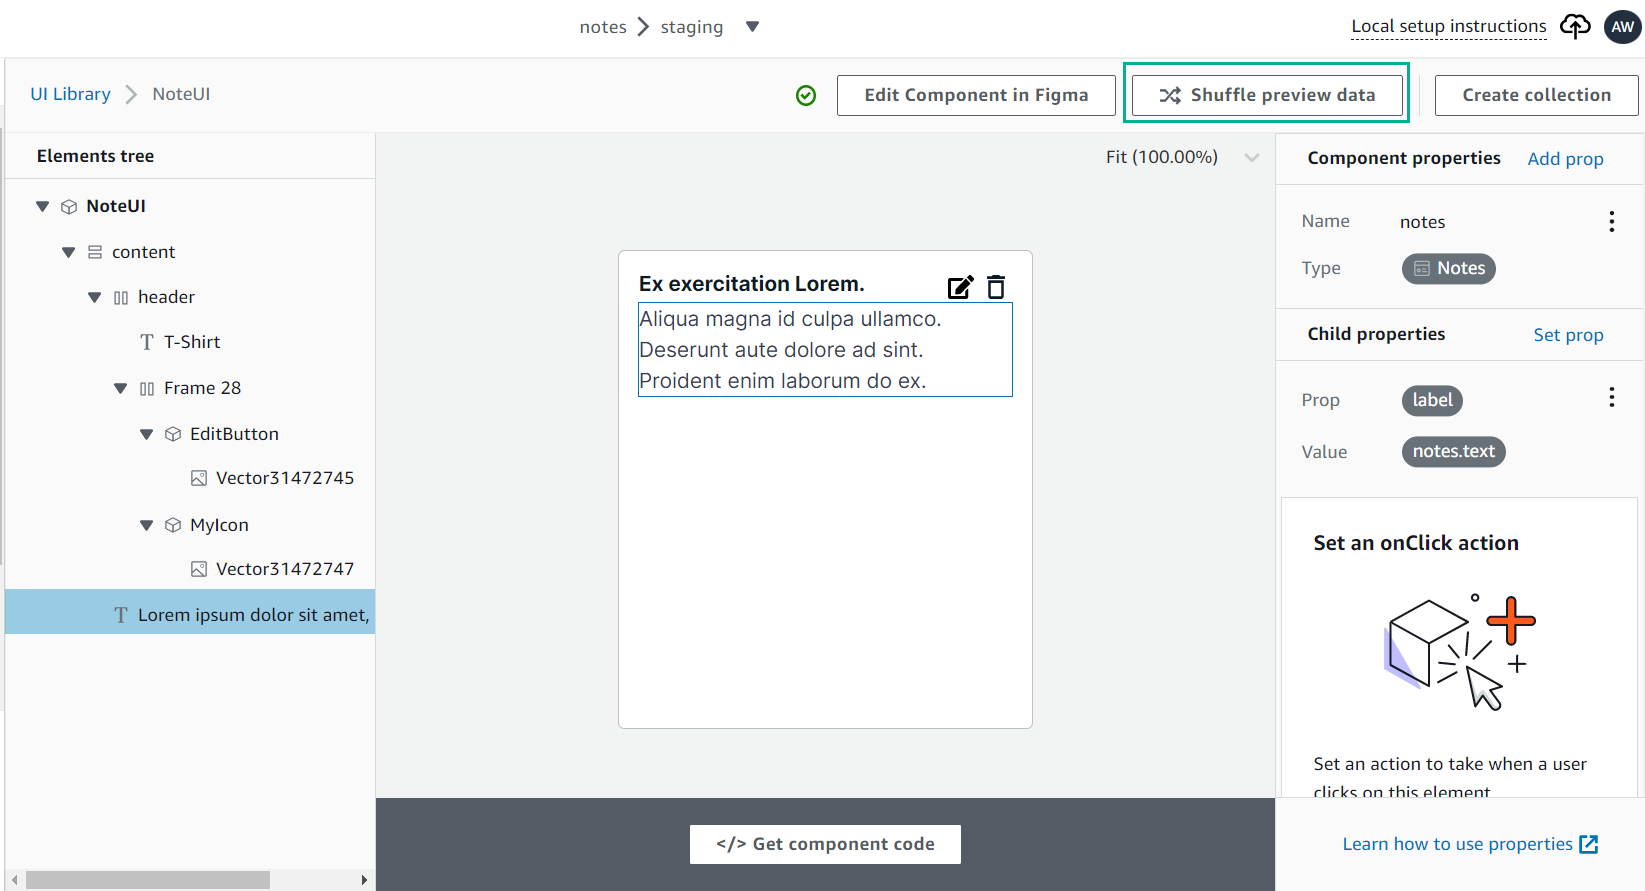
- Do the same for the note text - select the paragraph below the title.
- Set the label to
note.title. - Click on the trash can icon.
- Set
onClickholder toDeleteunder data. Then selectNotemodel and set ID tonote.id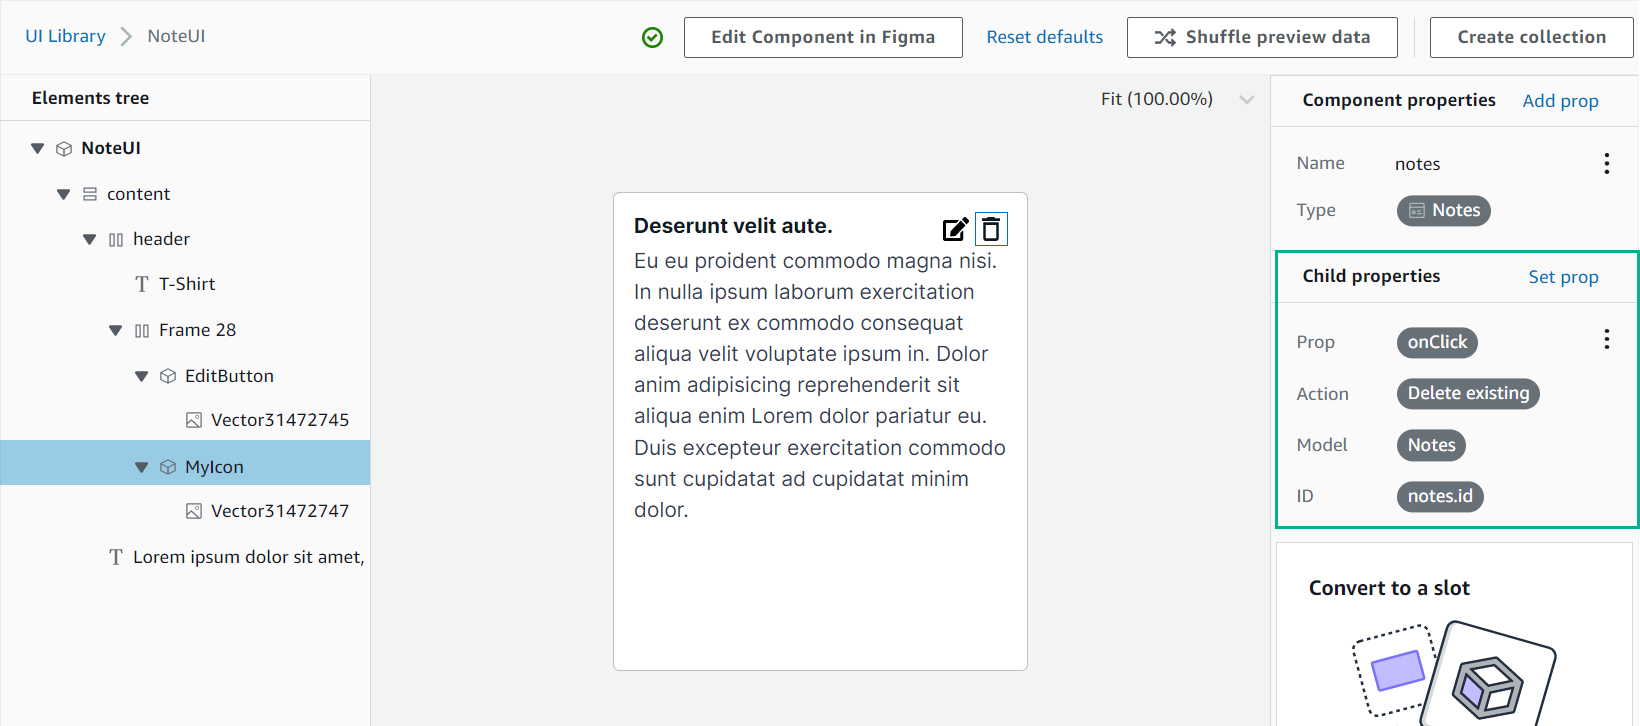
Create a form
- Back to UI Library.
- Click on the
CreateNoteform, then select Configure. Click Save and add
- Prop: `onClick.
- Action:
Create new. - Model:
Note. - Then select
titleinput to fill in the title model field and the like for the text. - The name
TextFieldcomes from Figma - you can rename the elements within it!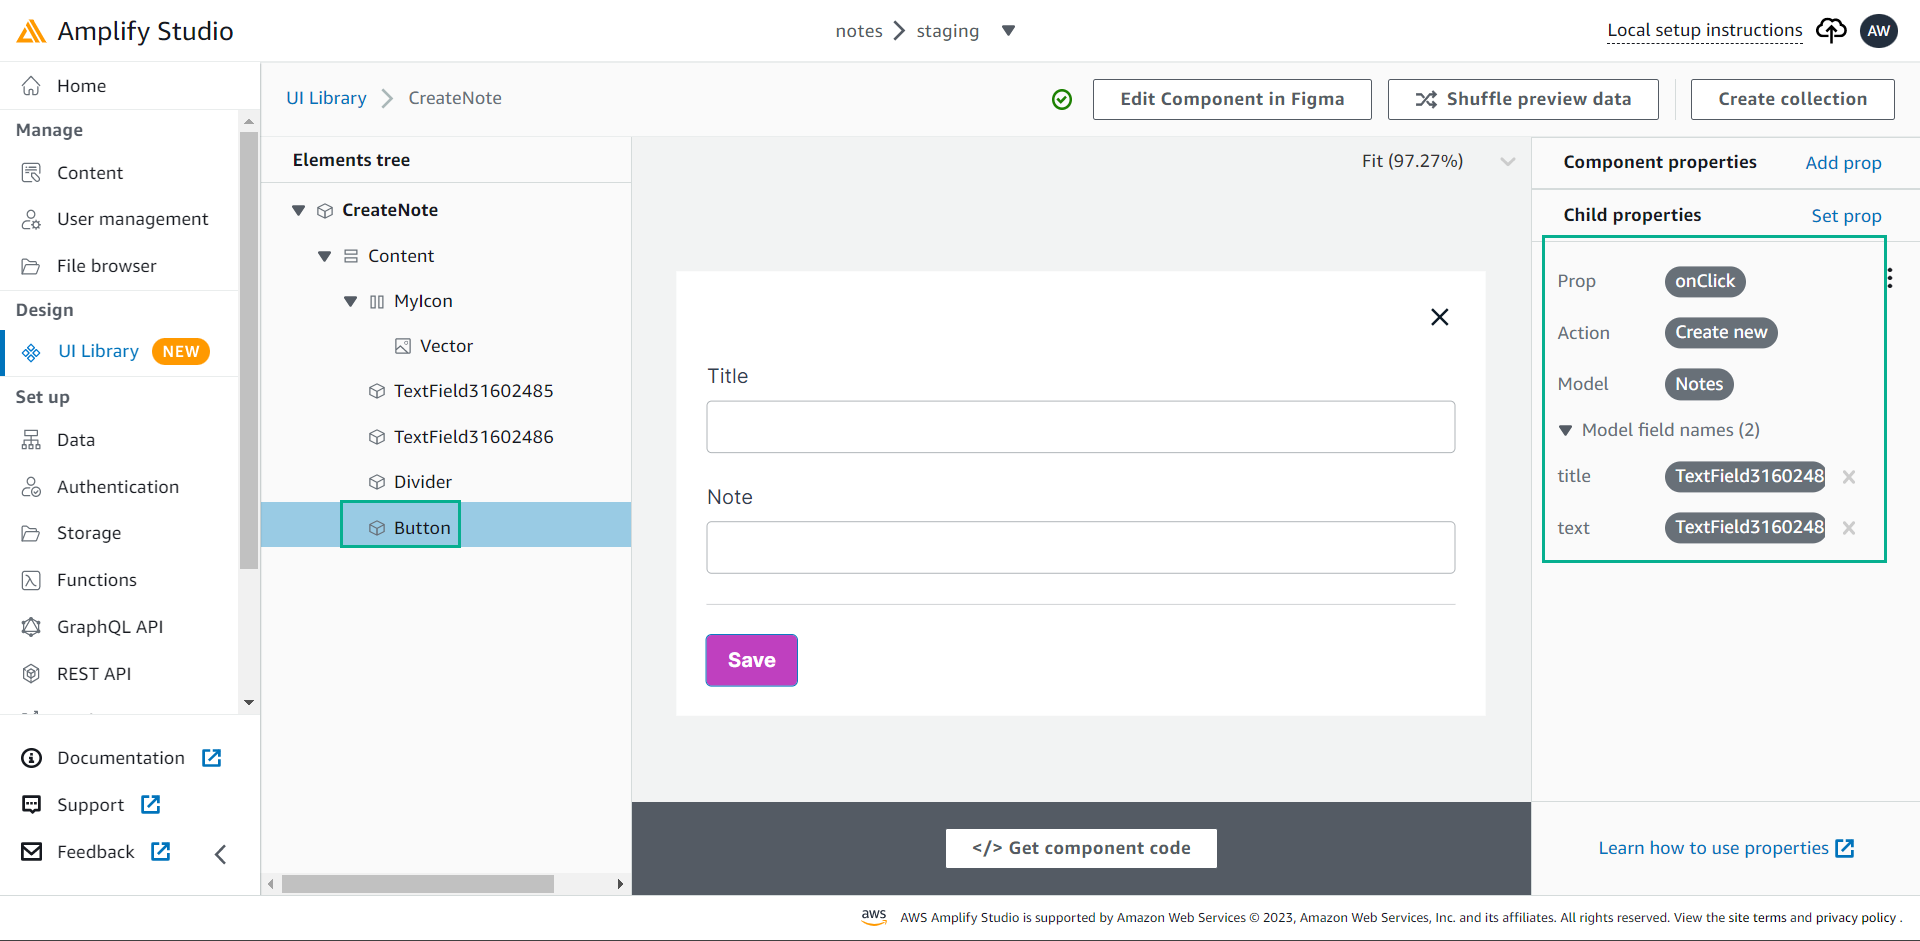
Update form
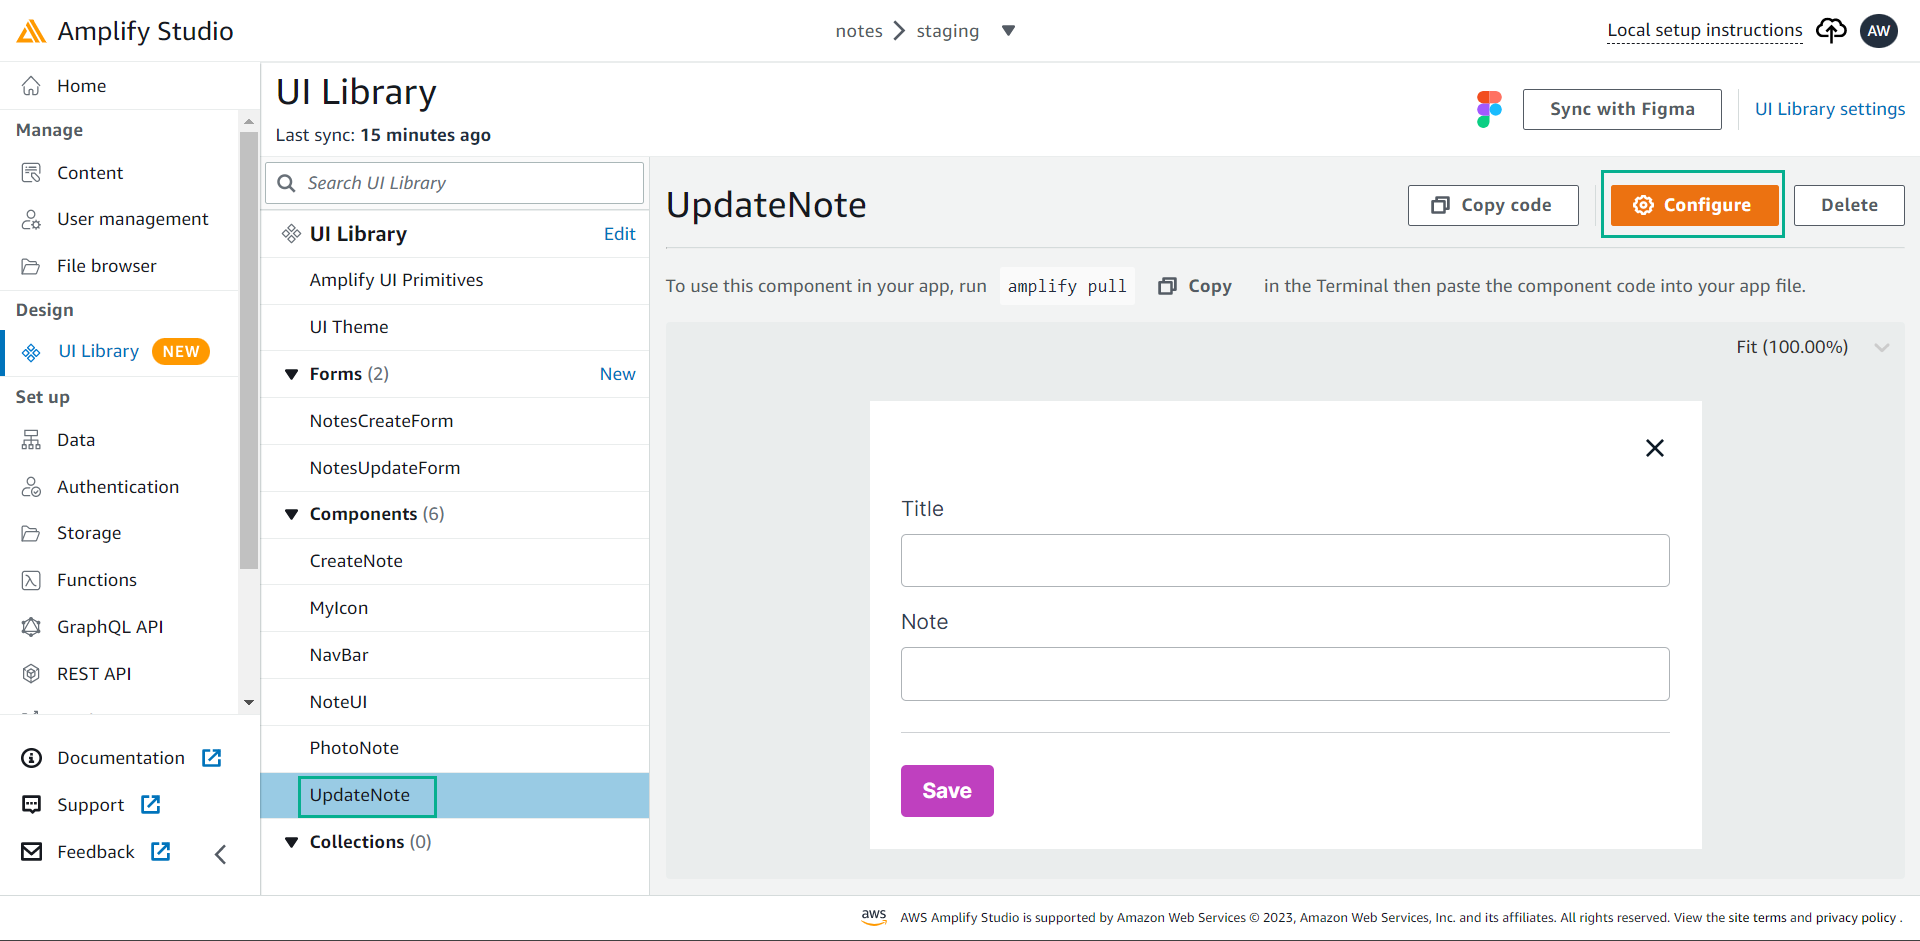
- Back to UI Library.
- Click UpdateNote , then select Configure. Click Save and add as shown below.
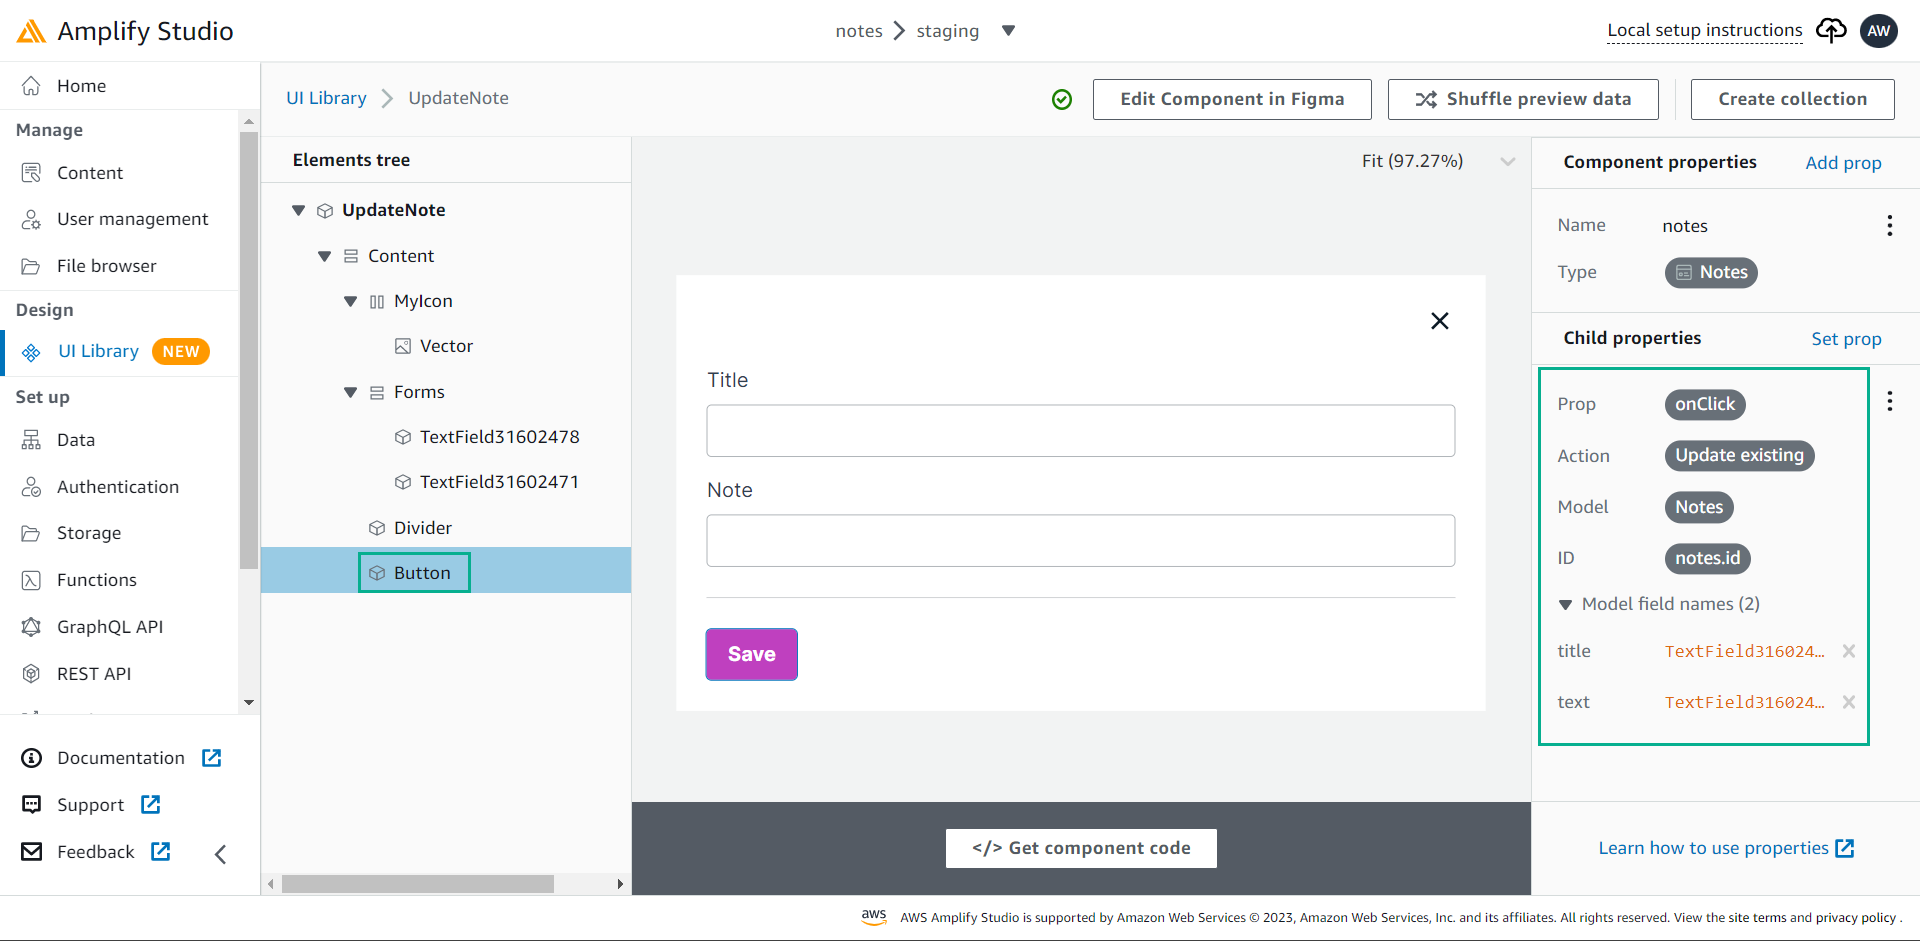 We have now linked the data we created in Amplify Studio with the UI components we created in Figma.